Must-Have Gear for Amateur Astronomy Enthusiasts 🌌
Welcome to the exciting world of amateur astronomy! Whether you’re just beginning your stargazing adventure or you’ve already spent some nights marveling at the stars, there’s something truly special about exploring the night sky. The universe is full of amazing sights, from the craters on the moon to distant galaxies far beyond our reach. But to truly enjoy these wonders, having the right gear makes all the difference. The right tools not only make it easier to see these celestial objects but also help you find your way around the vast night sky.
In this guide, we’ll walk you through the must-have gear for amateur astronomy. We’ll cover everything you need to get started or to take your stargazing to the next level, from picking the right telescope to understanding how accessories like eyepieces and star charts can improve your experience. Whether you’re observing from your backyard, a park, or even a city balcony, we’ve got you covered. Our goal is to make sure you’re well-prepared to explore the stars with confidence and to help make your stargazing experience as enjoyable as possible.
Telescope: Your Window to the Universe 🔭
A telescope is the cornerstone of any amateur astronomer’s toolkit. It’s your window to the universe, allowing you to see celestial objects in far greater detail than the naked eye ever could. But choosing the right telescope can be a bit overwhelming, especially with so many options available. Let’s break down the basics so you can find the perfect telescope for your needs.
Types of Telescopes
Refractor Telescopes
Refractor telescopes are often the first choice for beginners, and for good reason. They use lenses to bend light, creating sharp and clear images that are particularly good for observing the moon and planets. These telescopes are generally low maintenance, with a sealed tube that keeps out dust and requires little to no adjustment over time. However, they can become expensive as the aperture (the size of the lens) increases, which limits their practicality for deep-sky viewing unless you’re willing to invest in a higher-end model.
- Pros: Sharp, high-contrast images, durable, and easy to use.
- Cons: More expensive for larger apertures, limited for deep-sky objects.
- Best For: Observing planets, the moon, and double stars.
Reflector Telescopes
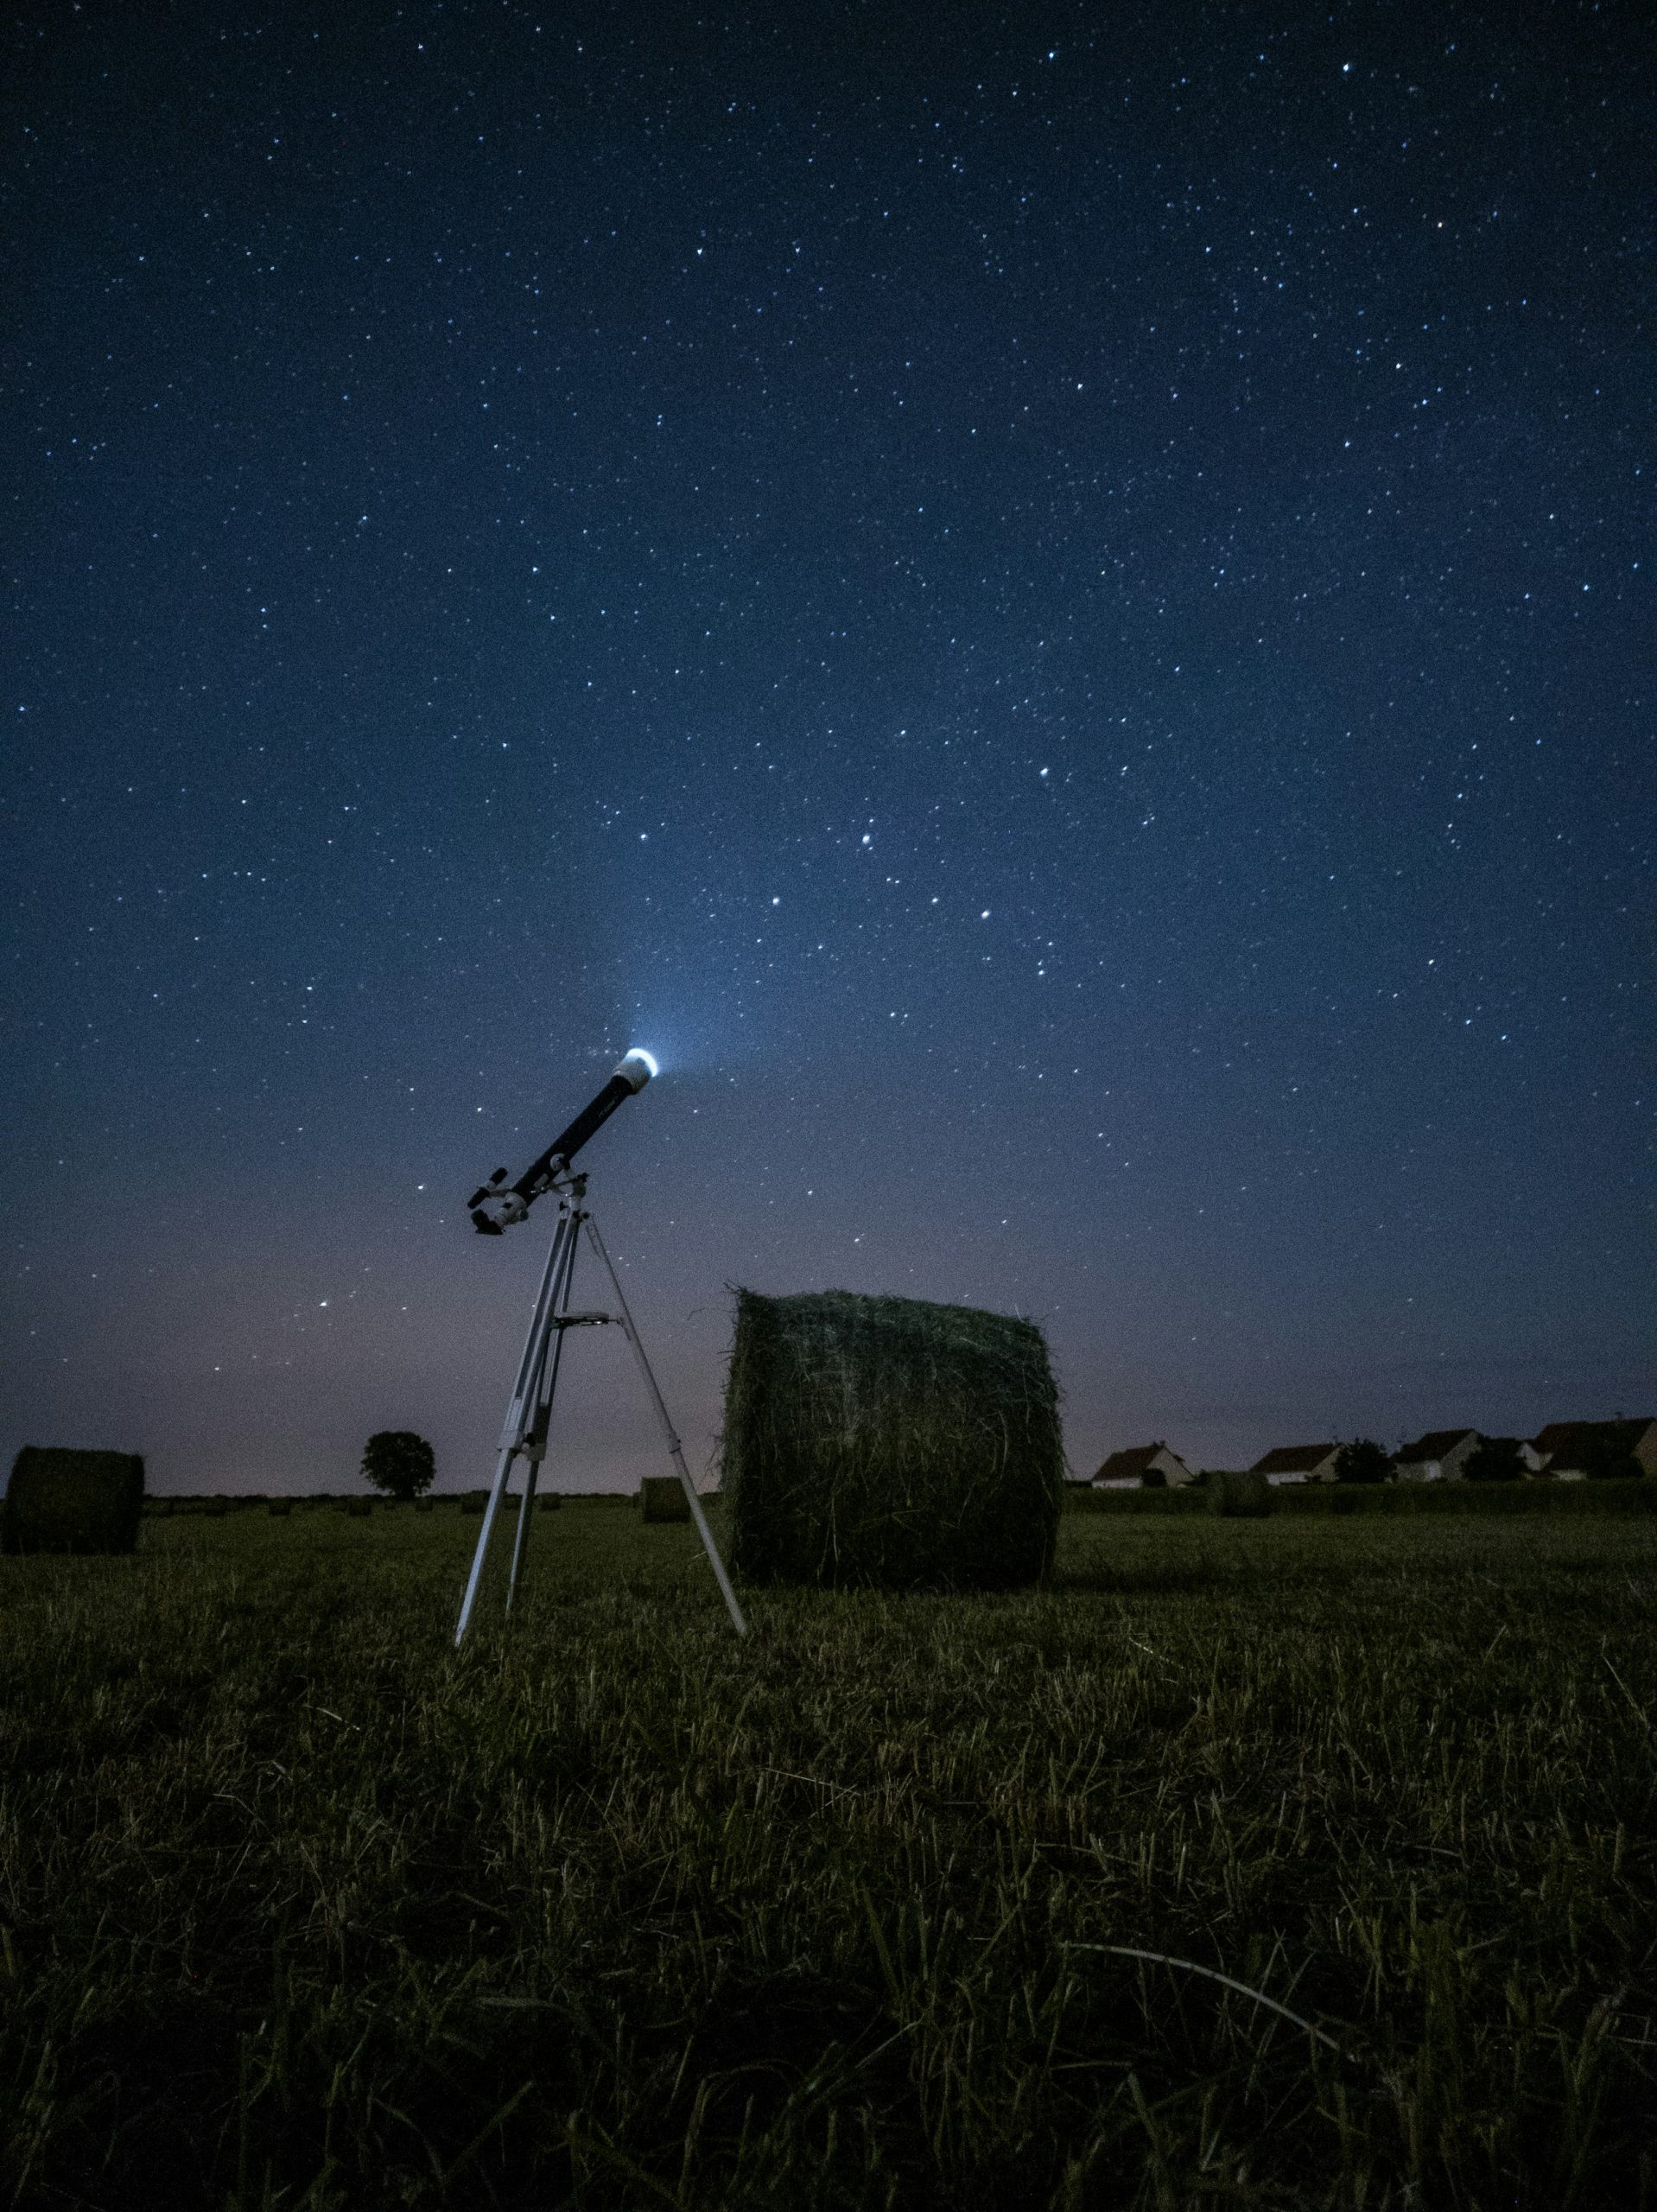
Reflector telescopes are the most common type used by amateur astronomers, particularly those interested in deep-sky objects like galaxies, nebulae, and star clusters. They use mirrors instead of lenses to gather and focus light, which allows for larger apertures at a more affordable price. This makes them a fantastic option if you want to explore beyond our solar system. However, they do require regular maintenance, such as collimation (aligning the mirrors), which can be a bit tricky for beginners.
- Pros: Larger apertures at a lower cost, excellent for deep-sky observation.
- Cons: Requires regular maintenance, more fragile due to open-tube design.
- Best For: Viewing distant galaxies, nebulae, star clusters, and other faint objects.
Compound Telescopes (Catadioptric)
Compound telescopes, also known as catadioptric telescopes, combine the best features of refractors and reflectors. They use a mix of lenses and mirrors, resulting in a compact and versatile design. These telescopes are highly portable and offer excellent image quality for both planetary and deep-sky observations. They are also well-suited for astrophotography. However, their advanced optics come with a higher price tag, making them a significant investment for serious amateur astronomers.
- Pros: Versatile, compact, good for both planetary and deep-sky observation, suitable for astrophotography.
- Cons: More expensive than other types, can be heavier.
- Best For: All-around use, especially if you plan to do some astrophotography.
Key Features to Consider
When choosing a telescope, there are several important factors to keep in mind to ensure you get the most out of your stargazing sessions.
Aperture Size
The aperture is the most crucial feature of any telescope. It refers to the diameter of the primary lens or mirror, and it determines how much light the telescope can collect. The larger the aperture, the more light it gathers, resulting in brighter and clearer images. A good starting point for beginners is a telescope with an aperture of at least 70mm (for refractors) or 130mm (for reflectors). Larger apertures are ideal if you want to see faint deep-sky objects, but they also make the telescope bulkier and more expensive.
- Rule of Thumb: The bigger the aperture, the more detail you’ll see. But remember, larger telescopes are less portable.
Focal Length
The focal length of a telescope is the distance from the main lens or mirror to the point where the image is brought into focus. It plays a significant role in determining the magnification of the telescope when used with different eyepieces. A longer focal length provides higher magnification, which is great for viewing planets and the moon. However, shorter focal lengths offer a wider field of view, making them better for scanning large sections of the sky or observing large deep-sky objects.
- Tip: For planetary viewing, choose a telescope with a longer focal length. For deep-sky objects, a shorter focal length may be more beneficial.
Mount Type
A telescope is only as good as its mount. The mount stabilizes the telescope and allows you to move it smoothly to follow celestial objects. There are two main types of mounts to consider:
Altazimuth Mount: This is the simpler and more intuitive option. It allows the telescope to move up and down (altitude) and left to right (azimuth). Altazimuth mounts are great for beginners because they are easy to set up and use. However, they do not automatically track the motion of the stars, so you’ll need to adjust the telescope manually as the Earth rotates.
Equatorial Mount: Designed to track the motion of celestial objects as the Earth rotates, an equatorial mount can be aligned with the Earth’s axis. Once set up, it allows the telescope to follow stars and planets with just a single axis adjustment, making it ideal for longer viewing sessions and astrophotography. These mounts are more complex and can be a bit challenging to set up, but they offer greater precision.
Pro Tip: If you’re just starting, an altazimuth mount is a great choice. As you gain experience, you might consider upgrading to an equatorial mount for more advanced tracking and photography.
Choosing Your First Telescope
For beginners, a good-quality refractor or reflector telescope with an aperture of at least 70mm (for refractors) or 130mm (for reflectors) is a great starting point. This size offers a good balance between portability and viewing capability, allowing you to see planets, the moon, and some brighter deep-sky objects without needing to invest heavily right away.
If you’re looking for versatility and portability, a compound telescope might be worth the investment, especially if you’re interested in both observing and astrophotography.
Top 3 Telescopes for Amateur Astronomy Enthusiasts 🔭
Choosing the right telescope can be a daunting task, especially with so many options available. To help you get started, we’ve handpicked three of the best telescopes that offer great value, performance, and ease of use for amateur astronomers. Whether you’re a beginner or looking to upgrade your current setup, these telescopes are our top recommendations.
Celestron AstroMaster 130EQ 🌟
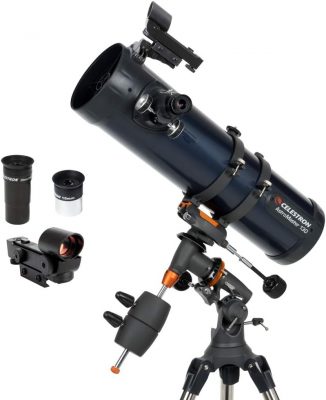
The Celestron AstroMaster 130EQ is one of the most popular beginner telescopes on the market, and for good reason. It’s a Newtonian reflector with a 130mm aperture, providing enough light-gathering power to view planets, the moon, and even some deep-sky objects like star clusters and galaxies. The telescope comes with an equatorial mount, which is a fantastic feature for those who want to learn how to track celestial objects as they move across the sky.
Key Features
- Aperture: 130mm (5.1 inches)
- Focal Length: 650mm
- Focal Ratio: f/5
- Mount: German Equatorial Mount with slow-motion controls
- Eyepieces Included: 20mm (33x) and 10mm (65x)
- StarPointer Red Dot Finder: Helps you easily locate objects in the night sky
- Portable Design: Despite its size, the AstroMaster 130EQ is relatively easy to transport, making it a good choice for stargazing on the go.
Pros
- Great Light-Gathering Ability: The 130mm aperture allows for detailed views of planets, the moon, and brighter deep-sky objects.
- Equatorial Mount: The German equatorial mount is excellent for tracking objects, which is especially useful for longer viewing sessions or if you plan to get into astrophotography.
- Value for Money: Offers a good balance of quality and affordability, making it an excellent choice for beginners.
Cons
- Assembly Required: The setup can be a bit complex for complete beginners, especially with the equatorial mount.
- Weight: While portable, the telescope and mount are not the lightest, so it may not be ideal for extended travel.
The Celestron AstroMaster 130EQ is perfect for beginners who are serious about getting into astronomy and want a telescope that will grow with them. It offers great performance for both planetary and deep-sky viewing, and the equatorial mount is a fantastic feature for learning how to track objects. If you’re looking for a telescope that balances quality, features, and price, this is a top contender.
Orion SkyQuest XT8 Classic Dobsonian 🌠
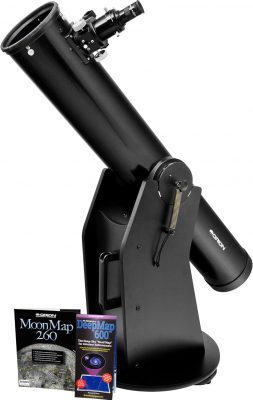
The Orion SkyQuest XT8 is a Dobsonian reflector telescope that’s designed for those who want a powerful yet easy-to-use instrument. With an impressive 203mm (8-inch) aperture, this telescope is capable of delivering stunning views of deep-sky objects as well as detailed planetary observations. The Dobsonian mount is simple and intuitive, making it perfect for beginners who want to avoid the complexities of equatorial mounts.
Key Features
- Aperture: 203mm (8 inches)
- Focal Length: 1200mm
- Focal Ratio: f/5.9
- Mount: Dobsonian Base with Altazimuth movement
- Eyepiece Included: 25mm Sirius Plössl (48x)
- EZ Finder II Reflex Sight: A simple, easy-to-use finder scope for locating objects
- Sturdy Base: The Dobsonian base is rock-solid, providing stable views even at high magnifications.
Pros
- Large Aperture: The 8-inch aperture offers exceptional light-gathering power, making it ideal for viewing faint deep-sky objects such as nebulae, galaxies, and star clusters.
- Ease of Use: The Dobsonian mount is straightforward and requires no polar alignment or tracking adjustments, which is great for beginners.
- Bang for Your Buck: Considering its performance and aperture size, the SkyQuest XT8 is one of the best value telescopes on the market.
Cons
- Size and Weight: The telescope is quite large and heavy, which can make it challenging to transport and store.
- Manual Tracking: Unlike equatorial mounts, the Dobsonian requires you to manually track objects as they move, which can be a learning curve for some.
The Orion SkyQuest XT8 is an excellent choice for amateur astronomers who want a powerful telescope that’s easy to use. Its large aperture allows for breathtaking views of deep-sky objects, and the simple Dobsonian mount makes it accessible even to those new to the hobby. If you have the space to store it and don’t mind manual tracking, this telescope will provide you with years of enjoyable stargazing.
Sky-Watcher Heritage 130P FlexTube 🌌
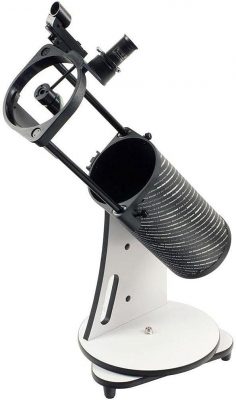
The Sky-Watcher Heritage 130P FlexTube is a compact and highly portable Dobsonian telescope that offers excellent performance for its size. With a 130mm aperture, this telescope is capable of delivering bright and clear views of a wide range of celestial objects, from the moon and planets to brighter deep-sky objects like star clusters and galaxies. The unique FlexTube design allows the telescope to collapse into a more compact form, making it easy to transport and store.
Key Features
- Aperture: 130mm (5.1 inches)
- Focal Length: 650mm
- Focal Ratio: f/5
- Mount: Tabletop Dobsonian mount
- Eyepieces Included: 25mm (26x) and 10mm (65x) eyepieces
- Collapsible FlexTube Design: Allows the telescope to collapse for easy storage and portability
- Red Dot Finder: Simplifies locating objects in the night sky
Pros
- Portable and Compact: The FlexTube design makes it easy to transport, ideal for stargazing on the go.
- Good Light-Gathering Ability: The 130mm aperture provides clear and bright views of planets, the moon, and brighter deep-sky objects.
- User-Friendly Design: The Dobsonian mount is simple and intuitive, making it easy to set up and use for beginners.
Cons
- Tabletop Design: Requires a stable surface, which can limit where you can set it up.
- Manual Tracking: As with most Dobsonian mounts, you will need to manually track objects as they move across the sky.
The Sky-Watcher Heritage 130P FlexTube is a great choice for beginners and those who need a portable, easy-to-use telescope. Its compact and collapsible design makes it perfect for taking on trips, and its 130mm aperture ensures you get excellent views of the night sky. If you’re looking for a telescope that’s both powerful and portable, the Heritage 130P is a fantastic option.
Eyepieces: Enhance Your Viewing Experience 👀
While the telescope itself is the most critical piece of equipment in your stargazing arsenal, the eyepieces you use play a significant role in what you can see and how clearly you can see it. Eyepieces are the lenses through which you view the night sky, and they determine the magnification, field of view, and overall quality of the images you observe. Investing in a good set of eyepieces can dramatically improve your stargazing experience.
Understanding Eyepiece Basics
Focal Length
The focal length of an eyepiece is one of the most important factors to consider. It is usually measured in millimeters (mm) and directly affects the magnification power of your telescope. The magnification is calculated by dividing the telescope’s focal length by the eyepiece’s focal length. For example, if you have a telescope with a focal length of 1000mm and use a 10mm eyepiece, the magnification would be 100x (1000/10 = 100).
Low-Power Eyepieces (20mm and above): These provide a wide field of view and are ideal for observing large, extended objects like star clusters, nebulae, and galaxies. They’re also great for locating objects in the sky before zooming in with a higher-power eyepiece.
Medium-Power Eyepieces (10mm – 20mm): These offer a good balance between magnification and field of view. They’re excellent for viewing the moon, planets, and larger deep-sky objects with more detail.
High-Power Eyepieces (Less than 10mm): These are used for high magnification, perfect for observing the finer details of planets, the moon, and double stars. However, high magnification comes with a narrower field of view and can be more challenging to use, especially in less stable atmospheric conditions.
Field of View (FOV)
The field of view is the extent of the sky that you can see through the eyepiece. It’s typically measured in degrees and is crucial for how you experience different celestial objects. A wide field of view allows you to see more of the sky at once, making it easier to find and track objects.
Apparent Field of View (AFOV): This is the angle of the field seen through the eyepiece, often ranging from 40° to 100° or more. Wider fields are better for deep-sky observations, allowing you to capture larger areas of space in a single view.
True Field of View (TFOV): This is the actual area of the sky you can see, which depends on both the eyepiece’s apparent field of view and the magnification used.
Pro Tip: For planetary observation, a narrower field of view with higher magnification is usually sufficient. For deep-sky objects, a wider field of view is preferable to capture the full extent of larger objects like nebulae and star clusters.
Types of Eyepieces
Refractor Telescopes
There are several types of eyepieces, each with different designs and features that cater to various observing needs:
Plössl Eyepieces: These are the most common and widely used eyepieces for both beginners and experienced astronomers. They offer a good balance of quality, affordability, and performance. Plössls typically have an apparent field of view of around 50° and are available in a wide range of focal lengths.
Orthoscopic Eyepieces: Known for their sharp, high-contrast images, these eyepieces are excellent for planetary observation. They have a narrower apparent field of view (around 40° to 50°) but offer exceptional clarity and minimal optical distortion.
Wide-Angle Eyepieces: These eyepieces provide a much wider apparent field of view, often 65° or more, which is ideal for observing expansive areas of the sky. They’re particularly popular for deep-sky observations, where capturing large nebulae or star clusters in a single view is desirable.
Zoom Eyepieces: A zoom eyepiece allows you to adjust the focal length within a certain range, giving you the flexibility of multiple magnifications without changing eyepieces. However, they generally offer a narrower field of view at lower magnifications compared to fixed focal length eyepieces.
Barlow Lenses: Multiply Your Options
A Barlow lens is an accessory that increases the magnification of any eyepiece it’s used with, typically by 2x or 3x. For example, if you have a 20mm eyepiece and use it with a 2x Barlow lens, the effective focal length becomes 10mm, doubling the magnification.
Why Use a Barlow Lens?: Barlow lenses are a cost-effective way to extend your collection of eyepieces without needing to purchase multiple high-power eyepieces. They also help maintain the eye relief of longer focal length eyepieces, making viewing more comfortable.
Considerations: While a Barlow lens is a great tool, stacking too many lenses or using it with very high magnification can reduce image brightness and sharpness, especially in smaller telescopes.
Eye Relief: Comfort Matters
Eye relief refers to the distance between your eye and the eyepiece lens where you can still see the full field of view. This is particularly important for those who wear glasses, as a longer eye relief (usually 15mm or more) ensures that you can observe comfortably without removing your glasses.
Short Eye Relief: Typically found in high-power eyepieces, short eye relief can make viewing uncomfortable, particularly for extended sessions or for people who wear glasses.
Long Eye Relief: Found in many wide-angle and Plössl eyepieces, longer eye relief is more comfortable for extended viewing and essential for eyeglass wearers.
Building Your Eyepiece Collection
For most amateur astronomers, it’s beneficial to have a variety of eyepieces to suit different observing needs. A good starter set might include:
- Low-Power Eyepiece: Around 25mm or 32mm for wide-field views.
- Medium-Power Eyepiece: Around 10mm to 15mm for general use, particularly for the moon and planets.
- High-Power Eyepiece: Around 5mm to 7mm for detailed views of planets and close-up lunar observations.
- Barlow Lens: A 2x Barlow lens to double the magnification of each of your eyepieces.
By building a collection of eyepieces with different focal lengths and fields of view, you can maximize your telescope’s potential and tailor your observing sessions to whatever celestial objects interest you most.
Eyepieces are a crucial part of your astronomy gear, dramatically affecting what you see through your telescope. By understanding the different types, focal lengths, and features of eyepieces, you can make informed decisions that will enhance your stargazing experience. Whether you’re scanning the moon’s surface or diving deep into the cosmos, the right eyepiece can make all the difference in bringing the universe into sharp, clear focus.
Top 3 Eyepieces for Enhancing Your Astronomy Experience 👀
Choosing the right eyepieces can significantly improve your stargazing experience, allowing you to see celestial objects with greater clarity and detail. Here are our top three eyepiece recommendations that offer great performance and value for amateur astronomers.
Celestron X-Cel LX 7mm Eyepiece 🌟
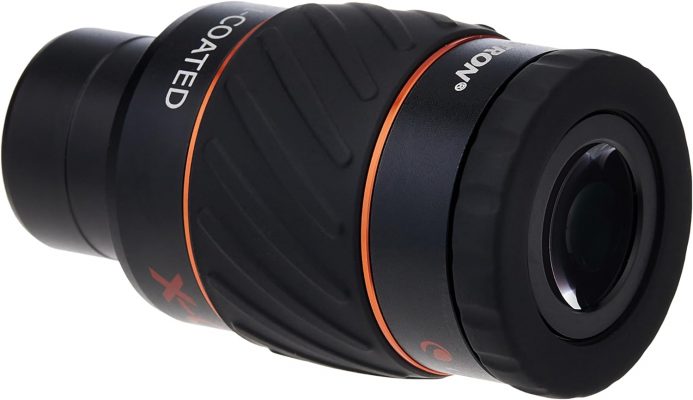
The Celestron X-Cel LX 7mm eyepiece is designed for high-magnification viewing, making it perfect for detailed observations of planets and the moon. With its premium optics, this eyepiece delivers sharp, clear images with excellent contrast. The X-Cel LX series is known for its comfortable long eye relief and twist-up eye cup, making it easy to use for extended periods, even if you wear glasses.
Key Features
- Focal Length: 7mm
- Apparent Field of View (AFOV): 60°
- Eye Relief: 16mm
- Optics: Fully multi-coated for maximum light transmission and contrast
- Barrel Size: 1.25 inches
- Twist-Up Eye Cup: Provides customizable eye relief and comfort
- Rubber Grip: Ensures a secure hold, even in cold or wet conditions
Pros
- High Contrast and Clarity: The fully multi-coated optics provide bright, sharp views, making it ideal for planetary and lunar observations.
- Comfortable Eye Relief: The 16mm eye relief makes it comfortable to use, even with glasses.
- Wide Field of View: The 60° AFOV allows you to see more of the sky, making it easier to track objects.
Cons
- Higher Cost: The X-Cel LX series is more expensive than basic eyepieces, but the quality justifies the price.
- Narrower Use: Best suited for high-magnification observations, so you may need additional eyepieces for other types of viewing.
The Celestron X-Cel LX 7mm eyepiece is an excellent choice for amateur astronomers who want to get the most out of their planetary and lunar observations. Its high-quality optics, comfortable design, and wide field of view make it a valuable addition to any eyepiece collection. If you’re looking for a premium eyepiece that delivers sharp, detailed images, the X-Cel LX 7mm is a fantastic option.
Baader Hyperion 13mm Eyepiece 🌠
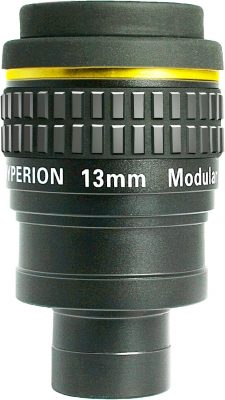
The Baader Hyperion 13mm eyepiece is a versatile and high-performance eyepiece that is perfect for both planetary and deep-sky observations. With an impressive 68° apparent field of view, it provides an immersive experience, allowing you to see more of the night sky in a single view. The Hyperion series is renowned for its high-quality construction and optics, making it a favorite among serious amateur astronomers.
Key Features
- Focal Length: 13mm
- Apparent Field of View (AFOV): 68°
- Eye Relief: 20mm
- Optics: Fully multi-coated with seven lens elements for superior image quality
- Barrel Size: 1.25 inches and 2 inches (dual barrel design)
- Modular Design: Allows for additional fine-tuning of focal length with optional accessories
- Twist-Up Eye Cup: Offers adjustable comfort for all users
Pros
- Wide Field of View: The 68° AFOV offers expansive views, making it ideal for deep-sky observations.
- Comfortable and Versatile: With 20mm of eye relief and a modular design, this eyepiece is comfortable and adaptable for various viewing needs.
- High-Quality Optics: The fully multi-coated lenses ensure bright, clear, and sharp images with minimal distortion.
Cons
- Size and Weight: The Hyperion eyepieces are bulkier than some other options, which might affect balance on smaller telescopes.
- Price: It is on the higher end of the price spectrum, but its performance and versatility make it worth the investment.
The Baader Hyperion 13mm eyepiece is a superb choice for those who want a high-quality, versatile eyepiece that can handle both planetary and deep-sky observations. Its wide field of view, comfortable eye relief, and modular design make it a standout option for serious amateur astronomers. If you’re looking for an eyepiece that delivers both performance and versatility, the Hyperion 13mm is hard to beat.
Tele Vue 32mm Plössl Eyepiece 🌌
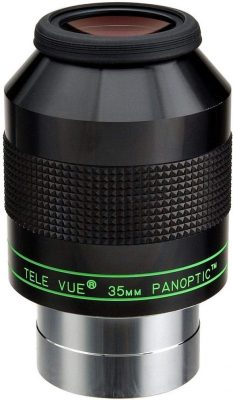
The Tele Vue 32mm Plössl eyepiece is a top-tier option for those seeking a low-power, wide-field eyepiece. This eyepiece is perfect for scanning large areas of the night sky, observing star clusters, and enjoying expansive views of the moon. Tele Vue is known for its high-quality optics, and this Plössl eyepiece is no exception, offering sharp, bright, and distortion-free images.
Key Features
- Focal Length: 32mm
- Apparent Field of View (AFOV): 50°
- Eye Relief: 22mm
- Optics: Fully multi-coated for maximum light transmission and clarity
- Barrel Size: 1.25 inches
- Classic Plössl Design: Offers simple, reliable performance with high optical quality
- Rubber Eye Guard: Provides comfort and helps block stray light
Pros
- Excellent for Wide-Field Viewing: The 32mm focal length and 50° AFOV make this eyepiece ideal for viewing large star clusters, the moon, and other expansive celestial objects.
- Comfortable Eye Relief: The 22mm eye relief is generous, making it easy to use for extended sessions and comfortable for eyeglass wearers.
- High-Quality Construction: Tele Vue is known for its precision optics, and this eyepiece delivers sharp, clear images with minimal distortion.
Cons
- Lower Magnification: As a low-power eyepiece, it’s not suitable for high-magnification observations, such as detailed planetary viewing.
- Price: Tele Vue eyepieces are premium products, and this Plössl is no exception, with a higher price tag compared to basic eyepieces.
The Tele Vue 32mm Plössl eyepiece is an outstanding choice for amateur astronomers who want a high-quality, low-power eyepiece for wide-field viewing. Whether you’re scanning the Milky Way, observing open star clusters, or enjoying lunar vistas, this eyepiece offers bright, clear, and expansive views. If you’re looking for a premium wide-field eyepiece that delivers exceptional performance, the Tele Vue 32mm Plössl is an excellent investment.
Telescope Filters: Enhance Your Viewing 🔍
Telescope filters are an often overlooked but incredibly valuable accessory for enhancing your stargazing experience. Filters can help you see more detail in celestial objects by reducing glare, improving contrast, and blocking unwanted light. Whether you’re observing the moon, planets, or deep-sky objects, the right filter can make a significant difference in what you see through your eyepiece.
Why Use Telescope Filters?
Filters work by selectively blocking or allowing certain wavelengths of light to pass through, which can improve the visibility of specific features on celestial objects. Here’s why you might want to use them:
- Improve Contrast: Filters can increase the contrast between different features on a planet or the moon, making subtle details more visible.
- Reduce Glare: Bright objects like the moon or Venus can cause glare that washes out detail. Filters can reduce this glare, allowing you to see more.
- Block Light Pollution: Light pollution filters can help block out the artificial lights from cities, making it easier to observe faint deep-sky objects.
- Protect Your Eyes: Solar filters are essential for safely observing the sun, blocking harmful rays and reducing brightness to a safe level.
Types of Telescope Filters
There are several types of filters available, each designed for a specific purpose. Understanding the different types can help you choose the right one for your needs.
Moon Filters
The moon is one of the brightest objects in the night sky, and viewing it through a telescope without a filter can sometimes be too intense. A moon filter reduces the brightness, making it easier to see details like craters, mountains, and maria (the dark plains on the moon’s surface).
- Neutral Density Filters: These filters reduce the overall brightness without altering the color of the moon, providing a natural and comfortable view. They are available in different levels of light reduction, typically ranging from 13% to 50% transmission.
- Variable Polarizing Filters: These allow you to adjust the amount of light that passes through, giving you more control over the brightness depending on your viewing conditions.
Pro Tip: A 25% transmission neutral density filter is a good starting point for lunar observation, providing a comfortable brightness level while still revealing fine details.
Planetary Filters
Planetary filters are colored filters that enhance specific features on planets by blocking certain wavelengths of light. Different filters work best for different planets, depending on what features you want to observe.
- Red Filter (#23A): Enhances features on Mars, such as polar ice caps and surface details. It also improves contrast on Jupiter and Saturn by darkening the blue sky background.
- Blue Filter (#80A): Ideal for observing the cloud bands on Jupiter and Saturn, as well as the Great Red Spot on Jupiter. It can also bring out details in the rings of Saturn.
- Yellow Filter (#12): Helps to enhance the polar regions and clouds of Mars and improves contrast in the belts of Jupiter.
- Green Filter (#56): Useful for observing the ice caps on Mars and enhancing the contrast in the cloud structures of Jupiter and Saturn.
Pro Tip: If you’re just starting out, consider getting a set of basic color filters, like the red, blue, green, and yellow filters, to experiment with how they enhance different planetary features.
Light Pollution Filters (LPFs)
Light pollution is a major challenge for many amateur astronomers, especially those living in or near urban areas. Light pollution filters are designed to block out specific wavelengths of artificial light, such as those from streetlights, while still allowing the light from celestial objects to pass through.
- Broadband Light Pollution Filters: These filters block out a wide range of light pollution wavelengths, making them effective for general-purpose use in moderately light-polluted skies. They are particularly useful for viewing bright deep-sky objects like star clusters and nebulae.
- Narrowband Light Pollution Filters (UHC Filters): Narrowband filters are more selective and block out most artificial light, except for specific wavelengths emitted by celestial objects, such as the hydrogen-alpha and oxygen-III lines. They are ideal for observing faint nebulae in heavily light-polluted areas.
Pro Tip: If you live in an area with moderate to heavy light pollution, a UHC (Ultra High Contrast) filter can significantly improve your ability to see faint nebulae and other deep-sky objects.
Deep-Sky Filters
Deep-sky filters are designed to enhance the visibility of faint celestial objects like nebulae, galaxies, and star clusters. These filters work by allowing only certain wavelengths of light to pass through, increasing contrast and making it easier to see these distant objects.
- Oxygen-III (O-III) Filters: O-III filters are particularly effective for observing planetary and emission nebulae. They allow the light emitted by oxygen atoms (specifically in the oxygen-III emission line) to pass through while blocking other wavelengths, which helps to increase the contrast of these nebulae against the background sky.
- Hydrogen-Alpha (H-alpha) Filters: These filters are used primarily for observing emission nebulae, which emit light in the hydrogen-alpha wavelength. They are especially useful for astrophotography but can also enhance visual observation of nebulae.
- Hydrogen-Beta (H-beta) Filters: H-beta filters are specialized for viewing certain faint nebulae, such as the Horsehead Nebula in Orion. They transmit light at the hydrogen-beta wavelength, enhancing the visibility of these elusive objects.
Pro Tip: If you’re a deep-sky enthusiast, investing in an O-III filter can make a dramatic difference in your ability to observe and photograph nebulae.
Solar Filters
Never attempt to observe the sun without a proper solar filter. Solar filters are designed to block out harmful ultraviolet and infrared radiation, as well as reduce the visible light to safe levels for observation.
- Full-Aperture Solar Filters: These fit over the front of your telescope and reduce the sun’s brightness to a safe level, allowing you to observe sunspots, solar eclipses, and other solar phenomena.
- H-alpha Solar Filters: These are specialized filters that allow you to observe the sun in the hydrogen-alpha wavelength, revealing details like solar prominences and flares. They are primarily used in solar telescopes designed for H-alpha viewing.
Safety Tip: Always ensure your solar filter is securely attached and free from any damage before using it. Even a small scratch or crack can let in harmful rays, causing permanent eye damage.
How to Use Filters Effectively
Using filters effectively requires some practice and experimentation. Here are some tips to get the most out of your telescope filters:
- Experiment with Different Filters: Different objects respond better to different filters. Don’t hesitate to try multiple filters on the same object to see which provides the best view.
- Start with the Moon and Planets: If you’re new to filters, start by using them on the moon and planets. This will help you get a feel for how they affect the image and what improvements they can offer.
- Combine Filters with Eyepieces: Pairing the right filter with the right eyepiece can make a big difference. For example, using a high-power eyepiece with a planetary filter can reveal more details on Mars or Jupiter.
- Observe in Dark Skies: While light pollution filters can help in urban areas, you’ll get the best results from all filters in dark-sky conditions. If possible, take your telescope to a location with minimal light pollution to maximize your viewing experience.
Top 3 Telescope Filters to Enhance Your Viewing Experience 🔍
Telescope filters can transform your stargazing sessions, bringing out details that would otherwise remain hidden. Whether you’re reducing glare on the moon, enhancing the contrast on planets, or cutting through light pollution to see faint nebulae, the right filter can make a huge difference. Here are three top-rated telescope filters that offer excellent performance and value for amateur astronomers.
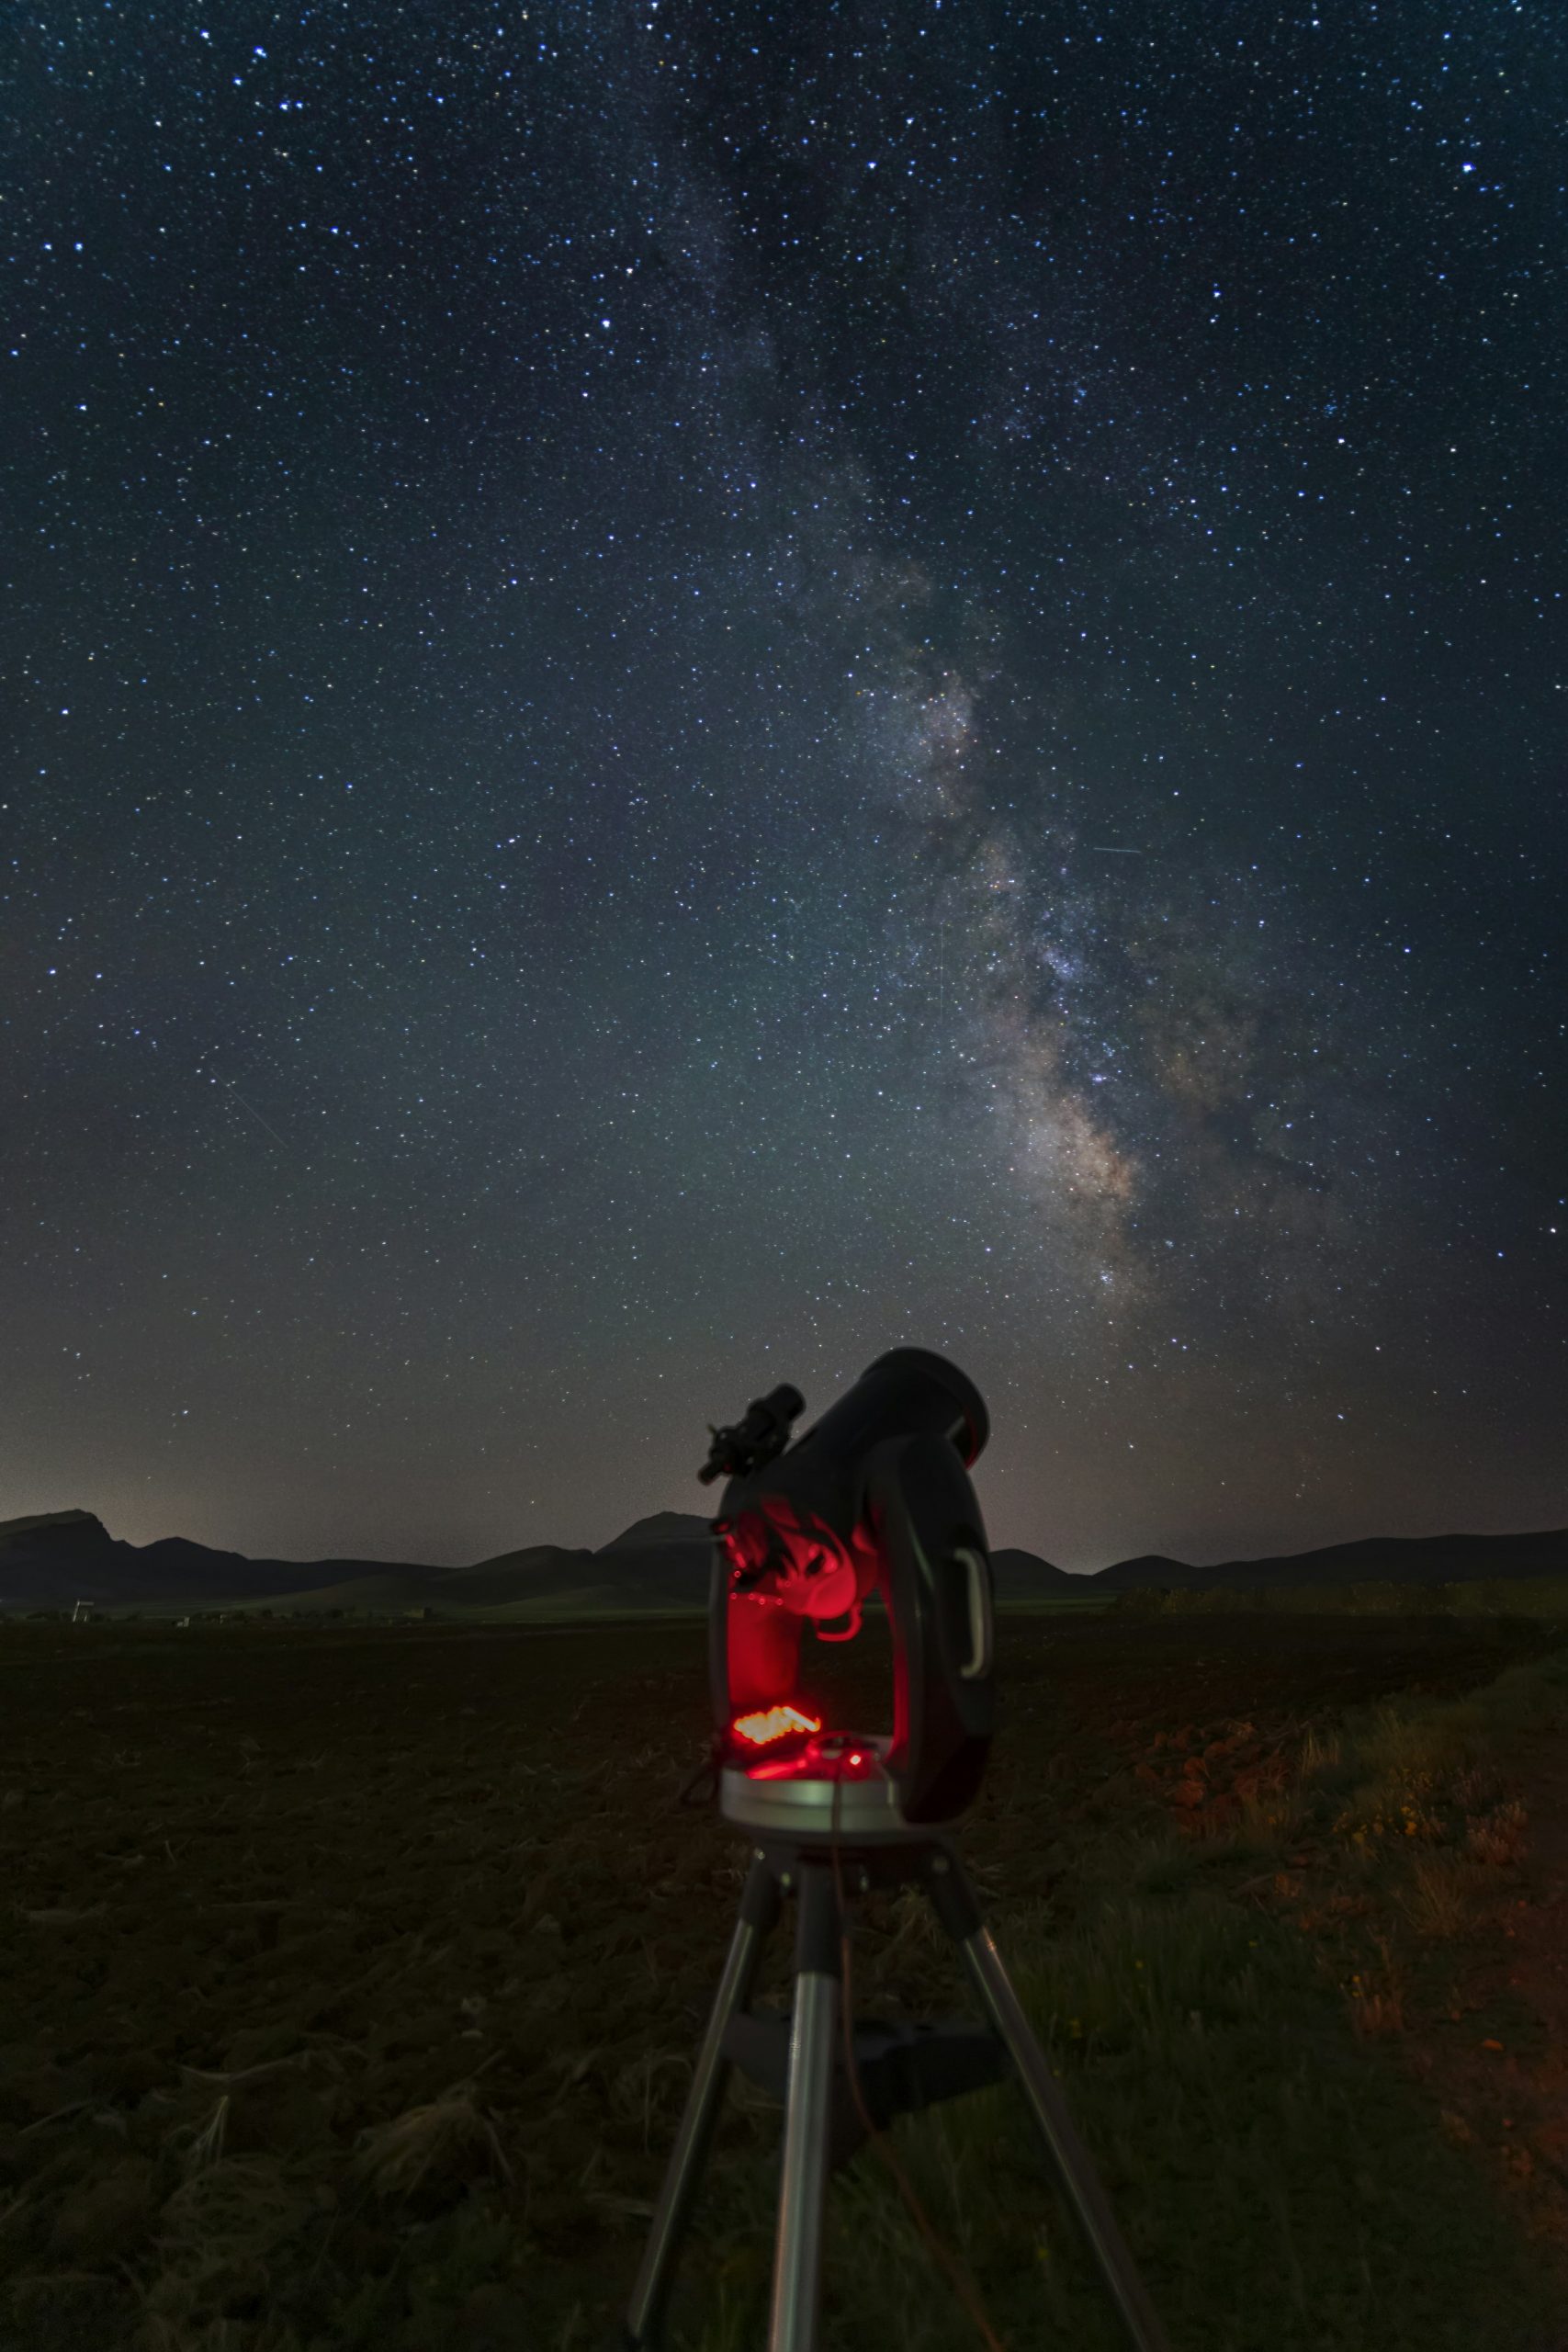
Baader Planetarium Moon & Skyglow Neodymium Filter 🌑✨
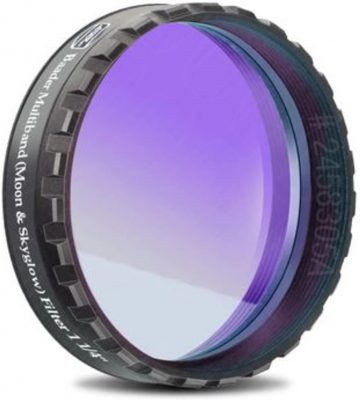
The Baader Planetarium Moon & Skyglow Neodymium Filter is a versatile filter designed to enhance both lunar and planetary observations while also cutting through light pollution. This filter uses neodymium, a rare-earth element, to selectively block specific wavelengths of light, which improves contrast and detail in your observations. It’s particularly effective for enhancing views of the moon, Jupiter, Saturn, and Mars, making it a must-have for planetary observers.
Key Features
- Type: Neodymium filter for lunar, planetary, and light pollution reduction
- Size: Available in 1.25-inch and 2-inch versions
- Optical Coatings: Features multiple anti-reflection coatings for maximum light transmission and contrast
- Versatility: Enhances views of planets, the moon, and cuts through light pollution for improved deep-sky observing
- Durability: Made from high-quality optical glass with scratch-resistant coatings
Pros
- Improves Planetary Details: Significantly enhances the contrast of planetary features like Jupiter’s cloud bands, Saturn’s rings, and Mars’ surface details.
- Reduces Light Pollution: Effective at reducing skyglow from artificial lights, making it easier to observe faint objects from urban areas.
- High-Quality Construction: Baader’s superior optical glass and coatings ensure minimal light loss and distortion.
Cons
- Moderate Light Pollution Reduction: While effective, it may not eliminate severe light pollution as well as dedicated narrowband filters.
- Price: It’s a bit more expensive than basic filters, but the performance justifies the cost.
The Baader Planetarium Moon & Skyglow Neodymium Filter is an excellent choice for those who want to enhance their lunar and planetary observations while also benefiting from some light pollution reduction. Its high-quality construction and versatile performance make it a valuable addition to any astronomer’s toolkit.
Orion Ultrablock Narrowband Filter 🌌
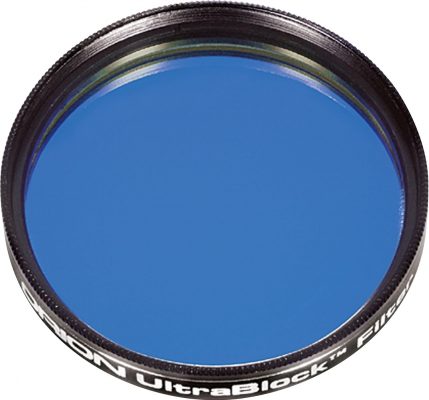
The Orion Ultrablock Narrowband Filter is designed specifically for deep-sky observers who want to maximize their views of faint nebulae and other emission-line objects. This filter blocks out nearly all light pollution while allowing the light from hydrogen-beta and oxygen-III emission lines to pass through, making it easier to observe faint objects in the night sky.
Key Features
- Type: Narrowband light pollution reduction filter
- Size: Available in 1.25-inch and 2-inch versions
- Transmission: Passes critical wavelengths in the hydrogen-beta and oxygen-III lines while blocking most other light
- Ideal For: Observing emission nebulae, planetary nebulae, and supernova remnants
- Construction: High-quality glass with advanced anti-reflection coatings for maximum contrast
Pros
- Excellent for Deep-Sky Observing: Significantly enhances the visibility of nebulae by blocking out light pollution and boosting contrast.
- High Transmission Rates: Allows key wavelengths from nebulae to pass through, resulting in brighter and more detailed views.
- Effective Light Pollution Reduction: Greatly reduces the impact of artificial lights, making it ideal for suburban and light-polluted areas.
Cons
- Narrow Application: Best suited for deep-sky objects; not ideal for planetary or lunar observations.
- Darkened View: The filter can dim the overall view, which may require a larger aperture telescope for the best results.
The Orion Ultrablock Narrowband Filter is a top pick for deep-sky enthusiasts who want to get the most out of their observations of nebulae and other emission-line objects. Its ability to cut through light pollution and enhance faint details makes it a powerful tool for observing in less-than-ideal conditions.
Astronomik UHC (Ultra High Contrast) Filter 🌠
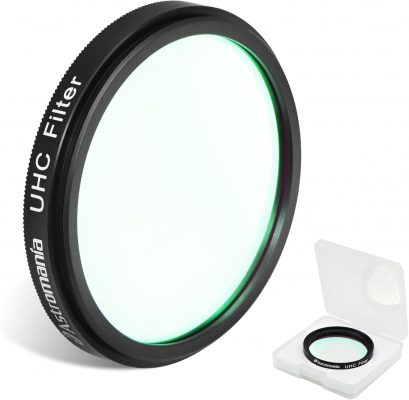
The Astronomik UHC (Ultra High Contrast) Filter is one of the most popular filters for deep-sky observing, known for its ability to dramatically improve the contrast of nebulae and other faint objects against the night sky. This filter works by blocking the wavelengths associated with artificial lighting and allowing the critical emission lines (O-III and H-beta) to pass through, making it easier to see objects like the Orion Nebula and the Veil Nebula.
Key Features
- Type: UHC (Ultra High Contrast) filter for deep-sky observing
- Size: Available in 1.25-inch and 2-inch versions
- Transmission: Optimized for O-III and H-beta emission lines
- Ideal For: Enhancing views of nebulae, star clusters, and galaxies
- Build Quality: Made with precision optical glass and features scratch-resistant coatings
Pros
- Exceptional Contrast: Greatly improves the visibility of nebulae by blocking unwanted light and enhancing key emission lines.
- Versatile Use: Effective in both suburban and dark-sky locations, providing clear and detailed views of deep-sky objects.
- Durable and Reliable: Astronomik filters are known for their high build quality and long-lasting performance.
Cons
- Higher Cost: As a premium filter, the Astronomik UHC comes with a higher price tag, but it offers excellent performance for serious observers.
- Not Ideal for All Objects: Best used for nebulae; not as effective for planets or stars.
The Astronomik UHC Filter is an outstanding choice for astronomers who are passionate about deep-sky observing. Its ability to enhance the visibility of faint nebulae and other objects in both light-polluted and dark skies makes it a must-have for those serious about exploring the deep cosmos. If you’re looking for a high-quality filter that delivers exceptional performance, the Astronomik UHC is worth the investment.
Frequently Asked Questions❓
1. What is the most important factor when choosing a telescope?
The most important factor when choosing a telescope is the aperture, which is the diameter of the primary lens or mirror. The aperture determines how much light the telescope can gather, which directly affects the clarity and brightness of the images you see. A larger aperture allows you to see more detail and fainter objects in the night sky.
2. What type of telescope is best for beginners?
For beginners, a refractor or a reflector telescope with an aperture of at least 70mm (for refractors) or 130mm (for reflectors) is a great starting point. These telescopes are user-friendly and provide good views of planets, the moon, and some bright deep-sky objects. Dobsonian telescopes are also a good choice for beginners due to their simplicity and large apertures.
3. Why are eyepieces important, and how do I choose the right one?
Eyepieces are essential because they determine the magnification and field of view of your telescope. Choosing the right eyepiece depends on what you want to observe. Low-power eyepieces (20mm or above) are great for wide-field views, while high-power eyepieces (below 10mm) are ideal for detailed observations of planets and the moon. It’s helpful to have a range of eyepieces to cover different magnifications.
4. How do filters improve my viewing experience?
Filters enhance your viewing experience by reducing glare, increasing contrast, and blocking unwanted light. For example, moon filters reduce the brightness of the moon, making it easier to see details, while planetary filters can highlight specific features on planets. Light pollution filters block artificial light, improving views of faint deep-sky objects.
5. What is a Barlow lens, and should I use one?
A Barlow lens is an accessory that multiplies the magnification of any eyepiece it’s used with, typically by 2x or 3x. It’s a cost-effective way to increase your range of magnifications without needing to buy multiple eyepieces. A Barlow lens is a great addition to any telescope setup, especially if you’re looking to get more versatility from your existing eyepieces.
6. Can I use my telescope in a light-polluted area?
Yes, you can use your telescope in a light-polluted area, but your experience may be limited. Light pollution makes it harder to see faint objects like galaxies and nebulae. However, you can still observe brighter objects like the moon, planets, and some star clusters. Using a light pollution filter can help improve your views by blocking out unwanted artificial light.
7. What is the difference between a narrowband filter and a broadband filter?
A narrowband filter blocks out most wavelengths of light except for specific emission lines, such as hydrogen-beta and oxygen-III, which are common in nebulae. This makes them excellent for observing faint deep-sky objects. A broadband filter, on the other hand, blocks a wider range of light pollution while allowing more light from stars and galaxies to pass through, making it more versatile for general-purpose observing in light-polluted areas.
8. How do I care for and maintain my telescope and accessories?
To keep your telescope and accessories in good condition, store them in a cool, dry place when not in use, preferably in padded cases to protect them from dust and bumps. Clean your optics sparingly and only with specialized cleaning kits designed for telescopes. Regularly check for dust and debris on the lenses and mirrors, and avoid touching the glass surfaces with your fingers.
9. Is it safe to look at the sun with my telescope?
It is only safe to look at the sun with your telescope if you use a proper solar filter that blocks harmful ultraviolet and infrared radiation. Never look at the sun through a telescope without a solar filter, as this can cause permanent eye damage or blindness. Solar filters should be securely attached to the front of the telescope before any solar observation.
10. Can I do astrophotography with an amateur telescope?
Yes, you can do astrophotography with an amateur telescope, especially with models designed for versatility, like compound telescopes. You’ll need a stable mount (preferably an equatorial mount), a camera adapter, and potentially additional accessories like a field flattener or reducer for deep-sky imaging. While starting with planetary or lunar photography is easier, deep-sky astrophotography may require more advanced equipment and practice.
